I absolutely love Freezer Paper Stenciling. The possibilities are endless and the results are amazing. Your friends will be astonished that you made these things!
Things you'll need:
An image to paint
Freezer Paper
Exacto Knife
Cutting Mat (You can use cardboard too!)
Iron/Ironing Board
Fabric Paint
Sponge Brush
Cardboard (To place inside the shirt)
How-To:
Print the image that you'd like to paint. This should be a silhouette type image, so that you'll have an outline to paint inside of.
Cut a piece of freezer paper to size. The paper should be larger than your image because you'll want some extra paper around the outside of your stencil when you paint. If you don't leave enough extra paper, you'll end up painting outside of your stencil.
The freezer paper has a shiny side and a dull side. Tape your freezer paper over your stencil, shiny-side down. Later, when you iron the stencil to the fabric, this is very important--If you cut the stencil with the shiny side up, when you go to iron it, your stencil will be backwards.
Use your Exacto knife to cut out all of the image that you'd like painted. (Cut to create the stencil.)
Be sure to save any cut pieces that you'll need to complete the stencil (see the triangle?).
This is how it should look when you're done cutting.
Place the stencil onto your fabric, shiny side down, in the location you'd like to paint. Remember to replace all of those pieces you cut out.
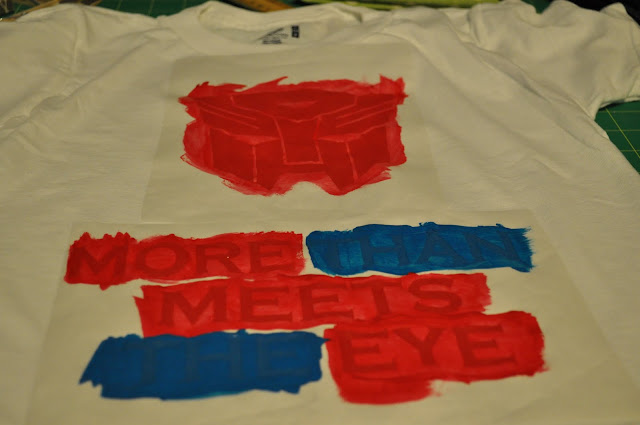
I decided to add some words after I had cut the Autobot symbol. I used my Silhouette to cut them directly from the Freezer Paper. I hadn't done this before, but it worked wonderfully!
Carefully iron the stencil in place. I suggest lifting, then replacing the iron, versus sliding it around like you typically iron. If you move from side to side, you're likely to snag an edge and tear the paper. If you just pick it up and then put it back down, your pieces won't move and you won't get under the edges at all. The paper sticks quickly, so you don't need to go crazy with the iron here.
BEFORE YOU PAINT, PLACE CARDBOARD INSIDE THE SHIRT! BE SURE THAT THERE IS A BARRIER BETWEEN THE LAYERS OF FABRIC OR THE PAINT WILL BLEED. Just trust me on this one.
Now you get to paint! Use your sponge brush to paint inside the stencil. Again, be careful around the edges. Depending on the color fabric and color paint, you may need more than one coat. I would let the paint mostly dry before adding another coat.
Let the paint dry before removing the stencil. The paint will smear if it's at all wet. Once dry, pull up the stencil. Some paints have to be heat-set with an iron and washed inside out. Just follow the directions on your paints for setting and the first wash.
Enjoy!


So, the shiny side goes against the fabric when you iron, right?
ReplyDelete