Showing posts with label Decorating. Show all posts

April 21, 2011

Red Clay


Have you heard of Red Clay yet?  If not, I'm sure that you will soon!  This is probably one of the coolest ideas I've seen for the creative world.  The idea came from founder, Abigail Kiefer, who just happens to be one of my childhood friends.  Of Red Clay, Abby says, "Red Clay stages challenges to solicit designs from the design community at large.  Each challenge sets design parameters by selecting a sustainable material, such as organic cotton, and identifies a provocative theme.  Red Clay searches out up and coming designers to contribute, giving them a platform on which to build their portfolio."

Not only is this a place for us to share our creative designs, it's also a place where we have the opportunity to vote on which designs we want to see produced.  The top ten designs receive a monetary prize, but even better than that, your design will be PRODUCED and SOLD, through Red Clay.  How cool is that?!

The first design challenge has already begun--Let Summer Shine In: The Textile Challenge.  There are already some amazing ideas out there.  I love that the only guideline given is the fabric.  You can literally create with any color that you can imagine.  Red Clay encourages you to think outside the box.  This is so much more than just a summer pillow design: Bags, ottomans, picnic blankets, wall decor, table settings!  If you can imagine it, they can make it!

I am definitely not a graphic designer, but more of a hands on person.  The design submissions don't have to be created on a computer.  Feel free to draw your idea, take a picture, then submit that.  The most important things right now is that the current design challenge ends at 6PM PST April 22, 2011.  The voting period ends Sunday May 1.

This is an amazing opportunity.  Where else can you design something in your own home, knowing that there's a possibility it will be produced and sold around the country?  Go visit Red Clay now!

March 8, 2011

St. Patty's Day Centerpiece Tutorial (Kid-Friendly!)

This is one of the cheapest and easiest projects I've ever done.  I am a leader for my daughter's Frontier Girls troop--We have six girls ages 4-6.  I did this project with all the girls on Monday afternoon and it went fabulously.  I was a little worried about Mod Podging with six wee ones, but they did a fantastic job, which emphasized to me how simple this project really is.

Want to know the best part?  Each centerpiece costs under $2!  All of the supplies (except for the Mod Podge) were purchased at our local Dollar Tree.

SUPPLIES
-Small square candle holder
-Scented tea candle
-Green decorative glass
-St. Patrick's Day Napkins
-Mod Podge  (Not pictured)
-Foam brushes (Not pictured, but available at the Dollar Store)
-Scissors (Not pictured)

Unfold a napkin.  Use your scissors to cut out two of the green squares with clovers inside.
Mod Podge a clover square to two opposite sides of the candle holder.
Fill the candle holder with the green class about 2/3 full.  Place the tea candle into the center of the candle holder.  (You can kind of twist it down into the green glass a little bit.)

Enjoy!

I'm currently working on a Home/Life Organization Binder.  It's nearing completion, so I hope to have photos up soon.
Also coming soon... A Spring Wreath! 

March 6, 2011

Clovers

I love St. Patrick's Day.  Maybe it's the Irish in me or maybe it's just another excuse to celebrate and decorate... Whatever the reason, I'm excited for the 17th!  Last year, I snagged a couple of wood clovers from Goodwill.  Each one cost me under a dollar.  I finally got around to Mod Podging them last week.

Later this week, I'll have a tutorial for a kid-friendly St. Patrick's Day centerpiece, made completely from Dollar Store supplies and costing less than $2!

October 15, 2010

Triplet Train Bunting

A friend of mine has triplet boys--Can you even imagine?  She is a complete saint and one of the best moms I know.  With three infants, though, she has people in and out of her house (helping) day and night...Lots of people.  I've been going over every Thursday night; in the beginning, I had trouble remembering which baby slept in which crib, as they are all three in one room.  I wanted to make something special for her boys and thought of a name bunting to hang over each crib, a way to make sure that all of her helpers know which boy sleeps where.  Here they are:

What do you think?

September 22, 2010

Fall Blessings Barn Star

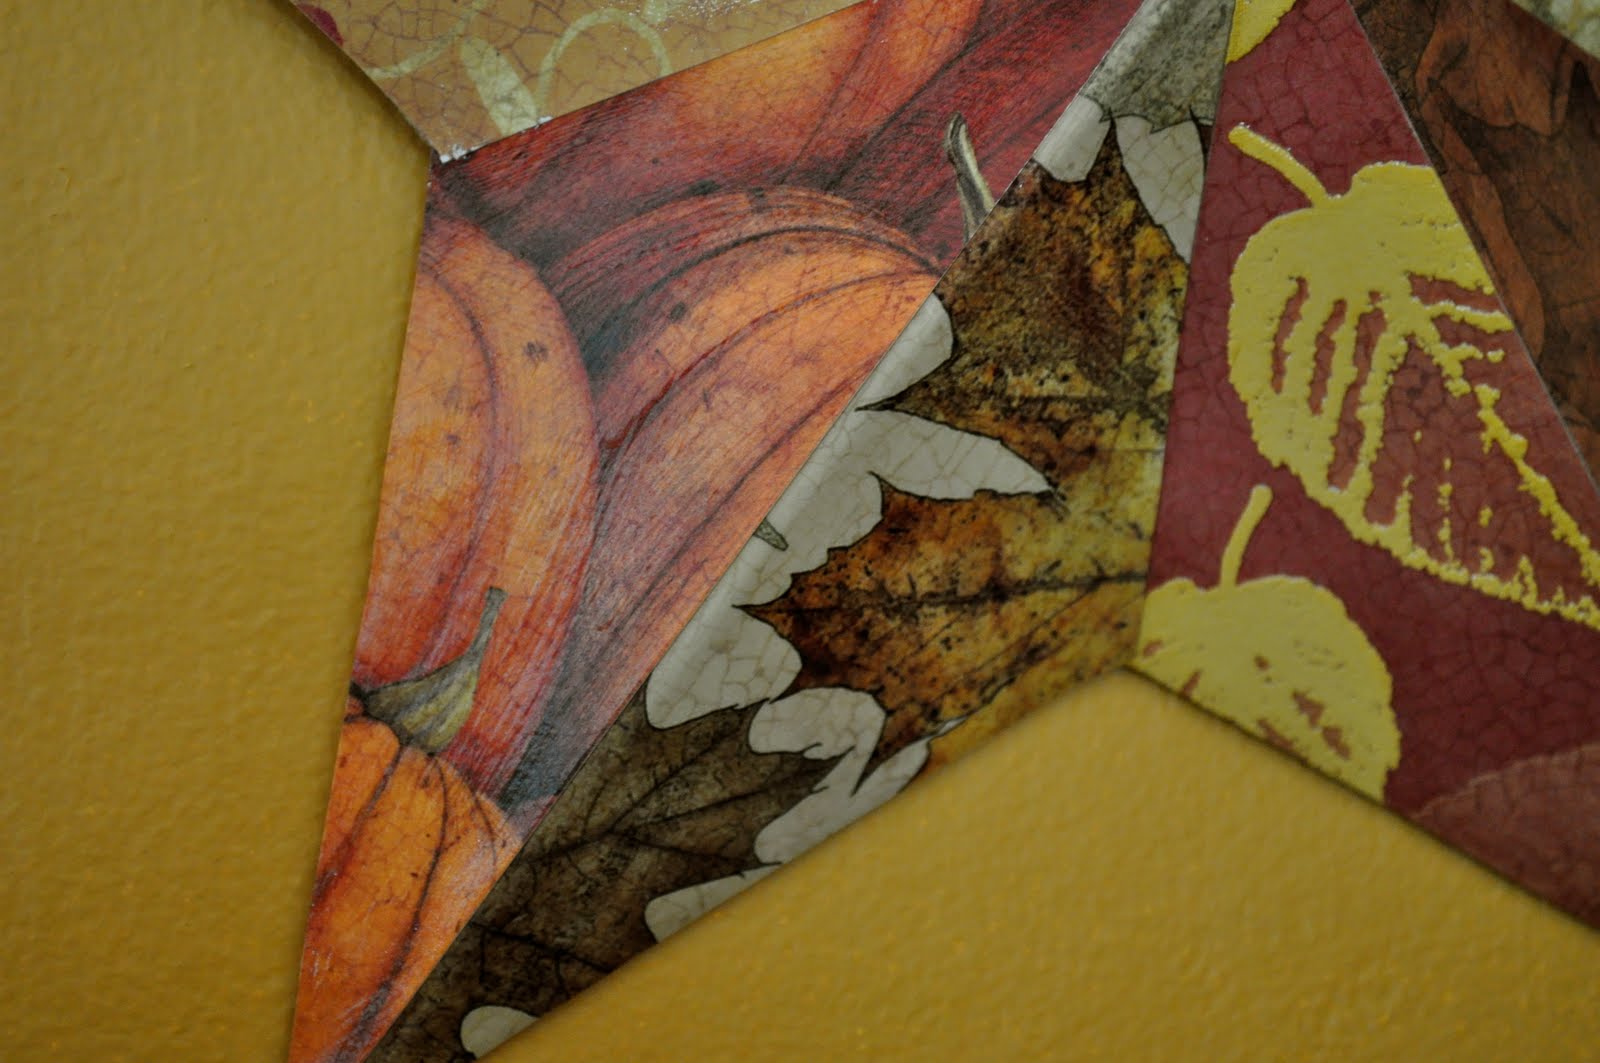
I've been eyeing barn stars for months now, but haven't wanted to spend the money to buy one.  Yesterday, though, while walking through Michaels, I found a paper mache barn star that was much cheaper than the plastic/metal ones I've seen previously.  I simply mod podged each star face with a different paper representing many of my favorite things about fall.  My 5 year old summed it up perfectly when she said, "I love it, Mommy.  I could just stare at it for hours."


I'm linking up to:
Join  us Saturdays at tatertotsandjello.com for the weekend wrap up          party!

September 5, 2010

Princess Tea Party

My daughter turned five years old yesterday, so we celebrated with a Princess Tea Party!  Because she's still so young, we only wanted to do something small.  We had six girls, for just an hour and fifteen minutes.  It was perfect... Any longer and I think it might have lost its magic.  Let me show you what we did!

Decorating was the main event.  Luckily, we were able to dig around our house and find just about everything that we needed.  I had purchased the giant rose wreath months ago at Goodwill--I was going  to pull the roses off and use the frame, but it was perfect for our tea party.  The lamp is from my kids' bedroom.  Then we just filled every glass jar we could find with pretty candies.  I picked up the china cupcake stand for a couple of bucks at Goodwill, as well.  We really only bought candy and balloons!
The cupcakes were a cinch to decorate.  I whipped up a batch of buttercream frosting, dropped a dollop of white onto each mini-cupcake, refrigerated them until set, then dropped another dollop of either pink or purple on top.  I topped them with a tiny pearl candy.
The cake is a two layer chocolate cake with chocolate buttercream frosting between the layers and on the outside.  I then used giant confetti sprinkles to polka-dot the whole thing.  I used the mini candy pearls (like on the cupcakes) to make a "5," and to outline the rose.  I created the rose from marzipan, then used edible pearl dust to color it pink.
To begin our tea party, we rang this beautiful bell.  It was my grandma's.
My daughter found this fancy hat candle holder at Goodwill, too, for only $2.  I always think of big hats when I think of tea parties, don't you?
To set the table, I purchased a cup and saucer for each girl, from Goodwill.  Each cup and saucer only cost about $.30, so to say that it was cost effective is an understatement!  We sent them each home with their own teacup and saucer, in lieu of goodie bags.

We began the party by decorating the crowns you see at each place setting (12 for $2.50 at JoAnn's).  The girls could color their crowns or glue tiny jewels onto the front.  (We already had the jewels, as they were actually the dragon scales that we used in the wand cores for my son's Harry Potter birthday party in April.)  This was a good opening activity, as it gave the kids something to do when they arrived, and while they waited for the actual tea party to begin.
After crown decorating, we painted their fingernails.  I just grabbed a few dollar varieties, plus some cheap decals that we put on once their nails were dry.  This was a big hit; all the girls talked about how excited their moms would be to see their pretty nails.
While the girls had their nails painted and waited to dry, my husband did face-painting.  We didn't do anything crazy, just whatever little thing the girls wanted.  It was mostly balloons, butterflies, hearts, etc.  I do think he did a castle with a moon in the middle and a red Christmas tree, though...
After the nails were dry and faces were painted, we served pink hot chocolate.  We don't drink real tea, plus I figured the girls would prefer hot chocolate to tea any day.  I simply heated eight cups of milk on the stove, poured in a bag of white chocolate chips (once the milk was steaming), added a touch of vanilla, then some pink food coloring.  Voila!
We also served the cupcakes, candy, cookies, etc. that were being used as decorations during this time.  This was the actual tea party!
Once the hot chocolate was poured, we sang Happy Birthday and ate cake.  Did I serve way too much sugar?  Yes.  Was it worth it, though?  Definitely!
Then we opened presents and time was up!  Short and sweet describes our Princess Tea Party perfectly.  My daughter loved it, the other girls had fun, and it was so very simple to do.  What more can you ask for?

I'm linking up to:

September 3, 2010

Easiest Fall Monogram Wreath Tutorial

Fall is absolutely, without a doubt, my favorite season.  On September 1st, I pulled out all of my fall decorations and spent the morning transforming my home.  (That was also the day my son started school, and I had to keep busy to keep from crying the entire day!)  Today the weather has cooled enough to make it feel like fall--What perfect timing, as I made a new fall wreath for our front door last night!  

SUPPLIES
Styrofoam wreath form (mine was 10")
Fall Ribbon--Enough to wrap the entire wreath and cover the door hanger
1 Strand/Garland of fall leaves (On sale now at JoAnn's!)
Floral Pins (Sewing pins would work fine, too.)
Door/Wreath Hanger

Wrap the fall-themed ribbon around the entire wreath, covering it completely.  I used floral pins to secure the ribbon, as I like to be able to change my wreaths around, but you could use a glue gun, instead.
Create a loop at the top of your wreath with one end of your leaf garland.  Secure it with a pin.
Continuing from where you started the garland with the loop, wrap the garland in and out of the wreath, until you've used the entire length.  (Sorry if this isn't too clear; just wrap it around, the same way you did the ribbon.)  Secure the end with another pin.  
You can see the pin that I used to secure the end of the ribbon in the first step.  Don't worry about those pins because you can arrange the leaves to cover anything that shows.
Wrap your door hanger in ribbon, too, if you like.  I used double sided tape to secure the ribbon.
This is what I first hung on my door.  I really liked it, but felt like it needed something else.  So I scrounged around my craft room and found a letter "D" that I had mod podged a few months ago, but never did anything with.  Luckily it fit perfectly inside my wreath, and matched!
Here's the final product!  I love the monogram in the middle; I feel like it really makes the wreath.  How easy was that?!

HAPPY FALL!

I'm linking up to:


July 28, 2010

PB Cord Cover Knock-Off Tutorial

While drooling over browsing the Pottery Barn catalog, I came across this:
It's a burlap cover for the hanging cord on a chandelier.  Immediately I thought of the chandelier that we have hanging in our dining room, and of course imagined it in red.  Then I went to work.  Here's my version:
It was actually fairly simple to make, once I figured out how I wanted to make it.  I wasn't sure if I should actually gather the fabric, or just make it long enough that it would scrunch itself on the cord.  I finally decided on gathering, which I think was the right choice.  Enough talking--Here's the tutorial.

Supplies
Fabric--I used 100% cotton.  You'll need (Length x1.75) + (Circumference of the cord +1").
Fusible Interfacing
Thread (Match your fabric)
Sewing Machine
Snaps

Step 1
Cut your fabric to the dimensions described above.  The x1.75 is for gathering and seam allowance (.5"), and the +1" is for the .5" seam allowance.  I am NOT a sewer, so please don't judge me too harshly on my technique/vocabulary here.  Please.

Step 2
Cut your fusible interfacing to 1" less than the length and 1" less than the width of your fabric.  (One inch off of one side and one inch off of the top.)

Step 3
According to the directions on the package, iron the fusible interfacing to the wrong side of your fabric.  The interfacing gives some strength to the fabric, which helps it stand up, instead of slinking down the cord.  

Step 4
Hem the top and bottom, i.e. the width, of the fabric.  I didn't do anything fancy for my hem.  I simply folded it down to the fusible interfacing (.5"), pinned it, then sewed.

Step 5
Pin the hem (same method as Step 4) on both of the remaining sides (lengths).  Then fold your fabric in half lengthwise.  You'll end up with a long rectangle.  (My fabric was a little bit see-through, which is why I used two layers.)  Now you're going to re-pin the hems together.  So, keeping the hems folded in, pin the fabric together.

Step 6
Using a basting stitch, sew the two sides together (along the hem line).  Gather the fabric until it is the actual length of your chandelier cord.  Sew over the basting stitches using a short stitch length.  Backstitch at the beginning and end.  (This will hold your gathers.)

Step 7
Use a basting stitch to sew .5" in from the folded edge, the entire length of the fabric.  (Sew a parallel line to the one in Step 6, but on the folded edge, instead of the open edge).  Gather the fabric until it is also the actual length of the cord.  Sew over the basting stitches using a short stitch length.  Backstitch at the beginning and end.

Step 8
Sew on your snaps, being careful that they match up on each side.  Place your snaps so that only one seam shows--One snap goes directly under the gathers (on the wrong side of the fabric), while the other snap goes on the right side of the fabric, next to the gathers.  Sorry, I don't have a picture of this.  I'll get one up as soon as I can.

Now you can climb up on a chair and snap that sucker on!  Enjoy!

I'm linking up to:


Join  us Saturdays at tatertotsandjello.com for the weekend wrap up     party!

Show and Tell Green The DIY Show Off


Related Posts with Thumbnails