May 31, 2010

Freezer Paper Monogrammed Doormat Tutorial

I found this fantastic doormat at TJ Maxx for only $8!  I've been dreaming of making a monogrammed doormat for ages, but haven't been able to find a plain doormat anywhere.  This one looks just right on my red front porch!  Sweet!
This is so easy, you won't even believe it!

Supplies:
Doormat
Freezer Paper
Exacto Knife
Spray Paint
Iron

Step 1: Trace a line onto the freezer paper, marking the top, bottom, and sides of the box in which you can place your monogram.  (This was the burlap box for my doormat.)


Step 2: Draw your monogram!  (I found a font I liked in Word, typed the "D," then freehanded it onto my freezer paper.)  Be sure to stay inside your box.
Step 3: Using the Exacto, cut out the letter you just drew.
Step 4: With the shiny side down, iron the freezer paper to the doormat.  Make sure that it's centered and straight!
Step 5: Spray paint the monogram.  Cover any areas of the doormat that are close to places you'll be painting.  I didn't have any problems with the paint bleeding under the freezer paper, but I also did a couple of light coats, instead of one heavy one.  
Let the paint dry, peel off the freezer paper, and you're done!

I love my new doormat!  Our TJ Maxx had tons of these doormats on sale--This was so easy, I'm honestly thinking about going back for more!  Wouldn't this make a great wedding present?  Anybody want one?!


May 28, 2010

Technique Night!

Last night I attended a Technique Card Making Class for Stampin' Up.  I absolutely love going to these classes, although I can't decide whether I love making the cards or just getting out of the house during bedtime more.  We made three amazing cards last night, so I thought that I would share them with you.

I also want to introduce you to my Stampin' Up demonstrator, Karen Clark.  I'm so excited to tell you that Karen is going to be doing some guest blogging for me in June!  We're still trying to work out the dates, but I think that we're going to put together a tutorial for a Vacation Explosion Album!  She's amazing, so you should be very excited!

Here are the cards we made last night:

This was made using a stencil and sponges
This was stamped with white craft ink, colored with watercolor pencils, then given some extra "pop" with a white gel pen.
Wow, right?  The petals are made with the butterfly punch (which I ordered last night!).  We used ink from the reinkers to dye the petals.


Do you love stamping as much as I do?

May 17, 2010

Respite

I won't be around until late this week because my husband and I are on vacation!  We left our kids (for the first time!) to explore Washington State, a place neither of us had either visited.  We have been here for a couple of days and are absolutely loving it.  Other than crying at the sight of a pink donut in a grocery store because I miss my daughter (and son, but the donut didn't remind me of him) SO MUCH, we're having an absolutely wonderful time.  So I'll be back sometime soon, nice and relaxed.

May 12, 2010

Teacher Appreciation Gifts


As you may have guessed from the title of the post, it's Teacher Appreciation Week at school.  My son, who is in first grade, has the most wonderful teacher.  She is everything a first grade teacher should be, which for my son means that she loves him and treats him like an individual little person.  She runs a tight ship, but knows each sailor's special needs and knows how to best help each one learn.  We decided that Mrs. Powell deserved something wonderful this year.  Let me show you what we came up with and how we made it!


Every day, my son's first grade class has Writer's Workshop.  They write, then edit.  For writing, they use black and blue gel pens.  For editing, they use green pens.  (And ever first grade class uses pencils!) So we decided to make a pen holder!  My son said that all of their pens and pencils are just in a bucket right now, and as a crafty lady, well that just won't do!  So this is what we made!

I am on a strict no-buying rule right now at home.  I have to use up all of my supplies before I can buy anything else.  Luckily I had this wood caddy that we hadn't used in years, just sitting in my basement.  BUT, if you want to make this too, I checked Target and you can find one just like it here.  


SUPPLIES
Wood Caddy
Scrapbook Paper
Mod Podge
Paint Brush (to apply Mod Podge)
Ruler
Pencil
Scissors
Yarn (for measuring)
Exacto Knife
Silhouette (or some other cutting machine--You could also just paint the letters on!)


Trace all four sides on the back of your scrapbook paper.  If you trace onto the front, your pencil marks will show.  Now cut out all of the pieces.

Mod Podge the paper on all four sides.  (This could take a while because you have to let one side dry before you can work on another one.  Hang in there!)


Measure the width and length of the top of the side.  Cut a strip of scrapbook paper to fit those measurements.  Paint a thin layer of Mod Podge onto the caddy, then lay the strip of paper on top.  Use your hands to gently scrunch the paper to fit.


Paint another layer of Mod Podge on top of the paper.  Scrunch the paper again, molding it to fit over the rounded top.  (This is messy and imperfect, but it's the best that I could do.  I actually liked how it looked in the end too!)

Use a piece of yarn to measure the circumference of the handle.

Trace (onto the backside again) around the top half only of the caddy.  We'll only be Mod Podging paper onto the top half--inside.

Take the following measurements:  (The point of this is to help us know where to put the circle of yarn that we measured, so that we'll know where to cut the circle from the paper.  It's ridiculously hard and there's probably a better way, so if I'm missing something obvious...)

Here's the hard part and I cannot believe I didn't take a picture!  I'm so sorry!  Mark your measurements on the paper, lay your yarn circle down, then cut.  Just do it and pray that it lines up.  My circle was  a little off, so I just cut a little more from one side to make it even.  The hole around the rod was a too big, but hey, that's just a tiny detail!  Good luck!  After you cut your hole, cut a slit from from the top of the paper down to the hole.  Then Mod Podge it in place!

After Mod Podging, if your edges hang over, use an exacto knife to trim them even.  Do a better job than I did!

Measure the width and lengths of the top the compartments.  Mine was the same width for every piece.  Cut your scrapbook paper to match.

Mod Podge the paper on to the top of each compartment.

Measure the length of your rod.  I was able to do this by measuring the length of the inside of the caddy, as my ruler wouldn't fit directly next to the rod.

Use a piece of yarn (cut it) to measure the circumference of the rod.  You can use the same one as before if it hasn't magically disappeared.  

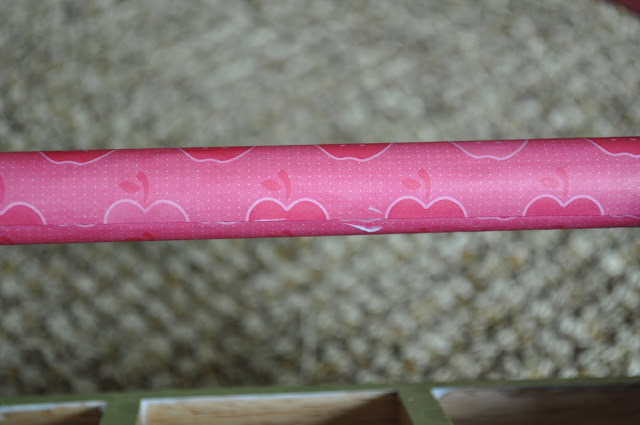
Cut a piece of scrapbook paper to the length of the rod and the height equalling the circumference of the rod, plus a little bit.  I know that's not mathematical, but I didn't measure how much I added.  Just add enough for the paper to overlap when you wrap it around the rod. 

Coat the rod in Mod Podge, then wrap the paper around the rod.  Let that dry, then coat the paper with Mod Podge.

Now you're done with the hard part!  If you have a Silhouette or Cricut, you can continue on with that.  You can also just leave it as is (because it looks awesome already!).  If you don't have a paper cutting machine, you can use paint instead!

I used white vinyl for the two long sides of the caddy.  I put the teacher's name on one side and a "phrase" I heard somewhere (but can't remember where) on the other side.  Then I filled it with pens and pencils.  Let me show you:


That's all for the tutorial.  But I do want you to see what else we gave to my son's teachers.  My daughter and I made these fantastic cookies.  She loves to cook, so this worked out wonderfully.  I got this cookie cutter set as a gift, but I happen to know you can find it at Williams & Sonoma.  (FYI, Mr. Seth is the student teacher.)


We added a little bit of icing, then stuck them in these sweet little boxes that I had picked up on clearance at JoAnn's a while ago.  I wish that I had had more time because I would have added a little color to the boxes, but I'm reminding myself that it's what's inside that counts!

The best part of all of this was the smile on my son's teacher's face.  She was so happy, so touched.  I think that we made her day.  But boy did she deserve it.

May 9, 2010

Inspiration Board Winner!

Thanks to all who entered the giveaway.  I was completely flattered that so many of you actually wanted this board--There were thirty entries!  Woohoo!

I used www.random.org to choose the winner.  It chose:
Edwards Family said...
So much fun, I can't even stand it! You are become a celeb blogger! So stinkin' cool...I can't believe I wasn't an actual follower yet! But you can bet it's on my blog now (c:
I happen to know Aubrey (I promise that it didn't influence her winning, though.  Otherwise I would have chosen my mom, as it's Mother's Day, and she entered!), and she is a pretty amazing lady.  Aubrey has the best sense of humor and she makes any situation fun.  She's also a mom of two adorable kids, so Happy Mother's Day!  I hope this makes your day!  
Just send me your address, Aubrey, and I'll have this in the mail sometime in the next couple of days.  Congratulations!
Thanks again to all who entered.  I truly love knowing that you all appreciate my creativity.  It's so neat to know that there are people out there who care about what I'm doing.  Thanks for supporting me at Martha Shmartha!


May 5, 2010

Cabinet Door to Picture Holder

Remember this trip?  During that IKEA run, I picked up a couple of white cabinet doors.  At the time, I wasn't sure what I was going to do with them.  I had seen a bunch of DIY projects using cabinet doors floating around blogland, but didn't have one pinned down.  Once I got home, the cabinet door and I stared at each other for a long time (several times).  I literally had no idea what I wanted to do with it.  Then one night, I just started working.  And suddenly, I had created a picture holder that had become one of my favorite creations ever.  I still haven't decided how to hang it one the wall--I'm up for suggestions!  I can't wait to show you!


I used stamps on the sides and the the bottom.  I wanted to used stamps for the top too, but couldn't find anything just right.  So instead, I used my Silhouette to cut vinyl, and laid that along either side of the photo clip.  I just glued the clip to the cabinet door.  I like it because I'll be able to swap out the photos so easily.  

I couldn't be happier.  And guess what?  This cabinet door cost me $2.  Sweet!

Good News and a Few Cards!

It feels like I haven't posted anything in forever!  I've been busy, so busy.  The end of the school year seems to bring endless concerts, field trips, performances, and lots of work!  On top of it all, my back is still giving me trouble.  The good news, however, is that crafting is my respite.  So despite not posting, I am still crafting little things here and there, where my back allows it.

I have good news!  I am going to be doing some guest blogging and blog swapping!  This is unbelievably exciting for me--I even called my mom when I got the good news (yes, I was that excited!).  On the first Wednesday of June, I will be guest blogging over at Tatertots & Jello.  Jenn runs an amazing blog over there with tons of creative and fun ideas.  She's sort of my crafty idol, so this is a pretty big deal. :)  Then on June 10th, I'll be blog swapping with Amy from Mod Podge Rocks.  Amy is the QUEEN of Mod Podge and has the most unreal collection of Mod Podge projects that you could ever imagine.  This is also a pretty big deal.  As you can imagine, I'm completely freaking out calmly thinking of great tutorials for my guest posts.  Send crafty thoughts my way!


Do you love the UPS man as much as I do?  That guy gets a pretty big smile at our house.  Well, a couple of days ago, he brought me the most amazing stamp.  I ordered this stamp from Stampin' Up a little while ago, but forgot about it until it came.  I am in love with this stamp.  Let me show you:


It's a giant cupcake stamp!  AMAZING!  The coolest part of the stamp was that it had a thank-you note written inside it.  I cut that part out, though, and put it on the back of the stamp.  That way I can use it just as a cupcake or I can stamp the thank-you note inside the cupcake as it was meant to be.  My son used it to write all of his birthday thank-you cards and I have made a bunch of different cards from it.  You can cut it out and send it just as a cupcake.  You can cut the frosting part of and stick it on the base with a dimensional.  There are so many neat ideas.  (Did I mention that I just love cupcakes?)

I've been trying to replenish my card supply.  I looked for birthday card the other day and realized that not only did I not have a birthday card, I didn't have any kind of card.  I try to keep a good stash so that I can send them out when I need them.  Here's one my daughter and I made today:

I'm going to try to crank out a few more cards tonight.  I'll try to get pictures when I'm done.  Sometimes I look at the pictures on other craft blogs and get so jealous that they are taken during daylight hours.  How do people find time to craft when their children are awake?  I can maybe get 10 minutes.  MAYBE.  Oh well, that's what the evenings are for, right?
Related Posts with Thumbnails